Showing posts with label 2 Pictures. Show all posts

Thursday, August 4, 2011

It's an Anniversary Blog Hop!

Hello friends! I'm so glad you're joining us in celebrating the TWO YEAR ANNIVERSARY of Practical Scrappers with our weekend Blog Hop! All of our designers have created some amazing projects relating to the number two since it's our second anniversary, and here's my take:

We have an extremely talented group of designers, I know you'll enjoy checking out their blogs.
Erin
Jessica YOU ARE HERE!

Now, how about a chance to win? Two of you will be very Lucky Girls when you play along!

Tell me your TOP TWO favorite things about this week's anniversary celebration at Practical Scrappers for a chance to win one of two RAKs from Lucky Girl Crafts!

I'll draw a winner on Monday, August 8th.

Thanks for joining us in the big celebration! Please head on over to the lovely Pia next!

Friday, December 31, 2010

Ringing in the new year with Lucky Girl Crafts!

Happy New Year, my friends! I hope this year finds you blessed with love & laughter, joy & prosperity, and of course - many crafty days!

Since today is the first of the month, it's the start of our January Blog Party! Join the Lucky Girls through Monday, January 3 for three days of amazing inspiration geared to help you kick off the new year in creative style. As always, there's also FIVE chances to win! Be sure to read on for more details...

Filled with tender romance, beauty and timeless charm, this kit is perfect for showcasing the loves of your life, spring beauty and precious moments. Vintage elements take on modern appeal with delicate trimmings, faux postage stamps, metallic rub-ons, and acrylic papers. It's a kit you'll fall in love with every time you take it out to play!

Want to get your hands on one of these amazing kits? There's only a handful of these kits left in the store, so you better hurry!


Here's my first take on this awesome kit -
a layout inspired by Creative Sketches sketch #135


I took the plain white Color Me Crazy Petaloo flowers and sprayed the smaller ones with glimmer mists, and painted the large one with Glimmerz water colors. I added my leftover Prima flourish from our September kit, some Tim Holtz adage tickets from our August kit, and a little of my ribbon stash, but besides that, everything you see is from the lovely January kit.

I love that "Forever Love" combines bright colors with Victorian elegance - since a lot of the colors are similar it really gives a neat way to pair the different styles.

Want to see more? Definitely stop by to see what the rest of the Lucky Girls have created:

Kim - Emily -Natalie - Store Blog

Love the kit? You're going to LOVE these specials:

Get FREE SHIPPING anywhere in the U.S. with orders of $40 or more through January 7th - use code FOREVERLOVE at checkout.
For international orders, please contact me for discounted shipping rates January 1-7 by e-mailing your order to jasafras98@yahoo.com

Save 20% on all current stock of "extras" through January 31 or while supplies last!
Prices as marked. Sale includes past kits, paper packets, ribbons, alphas, embellies & more!

www.LuckyGirlCrafts.com


**********

January 7th - last day to apply for our new Lucky Girl Design Team!Check out the details by clicking here.

Coming soon... weekly Friday Fun Day Challenges, featuring new work each and every Friday on the store blog for you to scrap lift, create & enter to win! Join us for the first one, Friday, January 7th.

**********
Finally, for your chance to win a lucky $7 store credit to Lucky Girl Crafts - answer today's question for me:

* What is your favorite accomplishment from 2010?

Earn 10 entries for the giveaways on all of the Lucky Girl Crafts Blog Party when you place any order between now and January 3!

Friday, October 15, 2010

Halloween 1989 - your weekly Frosted Designs challenge!

Patterned Papers: Pink Paislee, My Mind's Eye //Cardstock: Bazzill // Ink: Close To My Heart // Stickers: EK Success // Border Punch: Fiskars

This week's challenge at Frosted Designs is to create a fall or Halloween themed project and is hosted by one of my favorite Lucky Girls, Kim!

Lately I've been digging through boxes of photos from when I was a kid, so when I came across these pictures it was perfect!This picture was of me and my brothers more than twenty years ago. I'm 9 in this pic, my brother Jordan is only 4 and Justin is 7. It's so funny to think that now all of us have kiddos that fall within these ages.

Friday, May 14, 2010

Rockin' rainbow fun!

Hello my friends!

This week's challenge from Frosted Designs brings you bright and sunny colors, er... I mean, bright and RAINBOW colors!

We were challenged to use embellishments in rainbow colors... though when I read it, I thought it said to just use rainbow colors, period. Here's to fully reading the directions! LOL!
After all of the rain and cold, crummy weather we've been experiencing in my little corner of Colorado, I was needing something bright to lift my spirits, so alas, here came the inspiration for this fun layout.

I used three sheets of patterned paper for this layout - Making Memories (the stars), Glitz Designs (for the blue distressed photo mat) and We R Memory Keepers for the swirls, yellow scalloped accents, orange distressed journaling block and striped accent to the journaling block (which were all from one sheet of double-sided patterned paper). I also used a Stampin' Up paper clip-thing, self-adhesive patterned metal dots from Heidi Swapp and ribbon and journaling pens from Close To My Heart.

Be sure to check out the rest of the talented crew at Frosted Designs... I love what they've come up with this week!

Oh, and today's the last day for my Lucky Girl DT call! Get your entries to me by tonight at midnight MST!!!

Friday, April 16, 2010

Blingtastical!


Whew! What a week! My husband and I had a special post-anniversary trip to Fresh & Wyld Bed & Breakfast in Paonia last weekend, followed by day in sunny Grand Junction, dinner with his parents, a huge Science Sunday that I helped with in children's church, followed immediately by a scrapbook class that afternoon. This week, I started & finished two 20-page albums for a local school district's retiring teachers, we had Family Fun Night for a few hours at the kiddo's school last night, and today, we're heading out of town to visit family and my home town. I'm exhausted already - good thing I can sleep on the drive over!

Anyhow, spring is finally decided to make it's presence known in Western Colorado - finally - and it's been great. It definitely got me in the mood for this week's project at Practical Scrappers, where our challenge was to use bling or glitter in our projects. I picked bright colors for both standard gem-bling and glittered papers and accents for this fun layout.

Almost everything from this layout (including the sketch) was from the April kit from Magpie Club - she's super funny and a great scrapper, and she's a Colorado girl (well, a British-born Colorado girl) - so I feel extra good about supporting her. She has a monthly sketch challenge - using any products - for a chance to be a guest designer for a month for her kit club. Here's April's sketch.

Papers are primarily from American Crafts, except for the die cut scallop and itsy-bitsy, teeny-tiny yellow polka dot, which are both from Sassafras Lass. American Crafts also had those adorable coordinating chipboard & die cuts - from their Dear Lizzie line, plus the flocked green Thickers. The glittered journal block and letters are from Prima, and the rest of the bright & funky bling is from K&Co.

Today's the last day of the Blog Hop at Practical Scrappers - be sure to stop by the challenge sites and enter for a chance to win a bunch of amazing prizes!!!

Wednesday, March 24, 2010

Use your stash! Practical Scrappers 1+ yr. old supply challenge


Hi all -
This {delayed} post is from the Practical Scrappers use your stash challenge from last week. We had to use products on our project that we've had in our stash for more than 1 year - which, since I'm such a scrap supply hoarder, actually came easy to me!
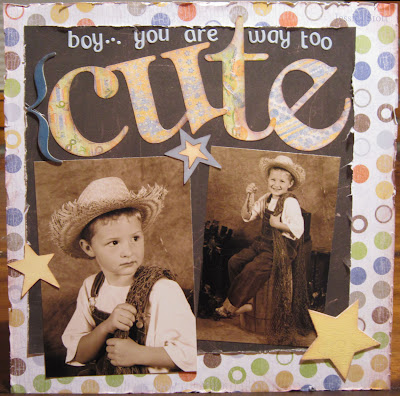
Literally everything on this layout are more than 1 year old - and in some cases, more than 2-3 years. Even the pictures, which are of Andrew when he was 5, are old!
The paper came from a Dog-themed set from DCWV, the large die cut letters are from Basic Grey that I got when I was pregnant with Sophia, the chipboard bracket & funky shaped star die cuts are from CTMH, and the large star is from Colorbok. Though you can't see it too well in the picture, the large star is also ligthly stamped with a swirly stamp from Stampin' Up. The small letter stickers are from Pink Paislee.

Thursday, March 4, 2010

Sometime's it's OK to raid your hubbys tools for scrapping... really!

It's technique week at Frosted Designs! This week we were instructed to create a layout featuring our favorite technique, so mine features sanding - talk about a great stress reliever!

I must admit, I have been known to raid the hubby's tool box in search of sandpaper from time to time, just for the sake of a good layout. I now have several sanding tools - the Tim Holtz mini grip sander and my Precision Files from Close To My Heart (which are amazing for detailed objects, like chipboard letters or frames or for getting into tiny nooks and crannies like scallop corners); but the rest of the time I stick to plain old sandpaper and even, an emery board! Emery boards (or nail files - whatever) are great for smaller items, like the letters here.


For this layout, I primarily sanded the edges of my papers, but here are some other techniques to try:

* Sanding in different directions across the width of your paper (like up and down then side to side) to create a faux-fabric look

* Sanding in circles across your paper

* Place objects under your paper - like flowers, chipboard elements, stamps, etc., to get a subtle outline of the image

* Sand your embellishments, like I did here, for a fun take on distressing

This layout was created with Close To My Heart papers and a mish-mash of tons of small embellies.

Thanks so much for looking! Be sure to stop by Frosted Designs to check out all of the amazing techniques, tips & tutorials from the talented group, too!

Friday, February 19, 2010

His best friend is a girl... (PS Weekend Sketch Challenge)

BLOGGER'S NOTE: For some reason, some of my scheduled posts for last week didn't post to my blog. Hmmm... very strange. So, this is from last week's sketch challenge at Practical Scrappers. It's a little late to play along with this sketch, but there's going to be another great sketch posted on their site Friday evening, so check it out!!!

My son's best friend has always been a girl. We met Maddi's parents in Lamaze class nearly 11 years ago, and they've grown up together. They were ring bearer and flower girl in a friend's wedding when they were almost 2, have celebrated birthdays and baptisms, gone off to summer camp and shared vacations and barbecues, and they tell each other everything. I'm so glad that he's got such an awesome relationship with such a special girl - and that I know she comes from a great family, too.

This fall I took Andrew and Sophia and their best friends (Soph's best friend is Maddi's sister) for a fun day out, and we stopped along the side of the road to experience the Colorado colors. I've been searching for the perfect papers to use for these photos, because they were so bright and colorful, and most of all - no fake smiles! I finally stumbled upon some old MAMBI papers that I had decided to use when I received this weekend's sketch for Practical Scrappers:I decided that I'd take the swirls that were on the patterned paper and cut them all out so I could manipulate them like the sketch suggested. It took a bit of time, but it was so worth it!

I put the swirls onto plain old vanilla cardstock from Close To My Heart, then added my photos and a doodled frame around the main picture. I used Jenni Bowlin rub-ons for the title and for the brown stars, then some red star brads from Making Memories. For the "girl" portion of the title, I used metallic red stickers from the dollar section at Target (hello good deal!) - though yo can't really see it here. Bummer. Oh - and I used another rub-on from Kaiser for the subtitle.


Be sure to post YOUR version of the sketch to Mr. Linky this weekend on the Practical Scrappers site. I can't wait to see what you come up with!

Friday, January 29, 2010

Tale of the good knight... (Frosted Designs challenge)

Once upon a time, in a land called Vegas, there lived a handsome knight Andrew who loved to defend his kingdom... the kingdom of Excalibur.

There was a time when Vegas was marketing the "family experience" which is good for us, because we love Vegas anyway. When I was a few months pregnant with Sophia, we took a family vacation to Vegas. Andrew got to be part of the family experiece and he got chances to pet dolphins & check out the tigers at Mirage; watch a kid-friendly pirate attack at Treasure Island (which it is definitly NOT that way now!); play in the endless arcade at New York New York and pretend to be a knight at Excalibur.

He made a pretty cute knight, don't you think? =)

Anywho, off to the crafty stuff...

This week's challenge at Frosted Designs was to emboss. I've had some fantasy die cuts from Stampin' Up forever, and most of them have a whimsical design and bright colors. Though the colors are fun, some (like for the castle) were way too girlie for what I needed them to be, so I embossed the heck out of them. Seriously.

For the dragon, I "distressed" his back & wings with Versamark and added a little gold embossing powder.


Each piece of the castle (minus the back wall) was embossed 3-4 times to get a smooth effect. The backwall only got a once-over to add a little texture to it. Finally, I added pop dots to the entrance piece of the castle for a bit of dimension.

All papers & stickers were Close To My Heart. I also used Stampin' Up ribbon and Bo Bunny brads.

Thanks for stopping by & checking everything out!

Thursday, January 21, 2010

Crazy for chipboard!

Our challenge this week at the newly-amped Frosted Designs was to incorporate chipboard into our projects. Digging through my stash, I found blue and orange chipboard alphas and flowers - a favorite color combo in our family - and knew immediately what to do!


We are huge Broncos fans. Andrew's first words were "Go Elway!" (no kidding!) and Soph's been throwing her "touchdown arms" up in the air since before she could crawl. Even through the dismal seasons we're rooting for the home team. Like, for instance, the end of this past season.

*cough*

To send some good juju to the team, Soph dolled up with rally hair - a special do topped with blue glitter and orange bows. Even though it didn't work, she still looked pretty stinkin' cute!

This layout is such an eclectic mix of supplies - cardstock, ink and dark blue swirly paper from Close To My Heart; orange polka dot paper from My Mind's Eye; and scraps of orange stripy paper from whoknowswhere. The blue chipboard is from K&Co., orange chipboard alpha from Target Dollar Spot; the orange chipboard flowers are Making Memories, and bling from Stuido 18. The pen is a Slick Writer from American Crafts.

Thanks so much for visiting and don't forget to stop by and say hi to all the new team at Frosted Designs, including my blogging buddy Kim Sparks from Practical Scrappers!

Thursday, January 7, 2010

All Buttoned Up!


Our layout this week at Practical Scrappers was to create a project with buttons. I've got jars and tubes and nooks and crannies filled with buttons, but so rarely pull them out that it was fun to dive into something "new". Pulling out some pics of the kiddos at the local touch-a-truck event 5 years ago and the "You Color My World" stamp from Close To My Heart, I was immediately inspired to create a fun rainbow - it worked great with the pics.
This layout uses Bazzill cardstock; My Mind's Eye papers; CTMH stamp & inks; Crayola colored pencils and lots of random buttons and tons of mini dots to glue them all down. I also popped up the free-handed cloud on some Stampin' Up dimensional dots.
Thanks for stopping by! Have a great weekend!!

Wednesday, January 6, 2010

Ringing in a new decade

I got a little craft time Monday night, had just printed off some fun pictures from our New Year's festivities and decided to play along in a few challenges.

The first is the Farewell 2009 challenge at the American Crafts blog. You had to create a layout celebrating 2009 or 2010 using two or more American Crafts products.

This layout features almost-exclusively American Crafts products, including my faves - Thickers. Seriously. If I was a rich girl, I'd have them in every single stinkin' style! Alas, bills to pay, real life to live. ;p For this layout, I used Thickers in blue foam "Subway" and chocolate brown puffy "Chit Chat" letters, plus papers from their Merrymint line. I love how these papers are glittered & embossed - all the hard work is done for me and it looks great!

The only non-AC products is the white and red Bazzill cardstock and the brown Tim Holtz ink.

The other challenge is for the So Sketchy December -month-long challenge. Sadly, this great sketch site is hosting it's last round of challenges, and they will be going out with a bang. (I'm doubly sad, because I just now found the site! Ugh!!!)

To enter in the extended December contest, you can choose from any of their December sketches to submit and comment on at least three of December's postings. I chose to do the December Sketch #10.

Saturday, January 2, 2010

Winter Babies

Happy New Year, friends!
This week has been crazy - I've had company for the last four days who just left this morning, then more to come this afternoon. Since Wednesday I've had good-old-fashioned family dinners, night-time snow swimming at the Hot Springs Pool; a huge New Year's Eve party filled with my niece & nephew, sister & brothers, cousins, friends, dad & step-mom and of course, my happy little family; a huge New Year's Day brunch, sledding, (with a little incident of my own on the first run - ow!) a Beatles Rock Band Jam, and some worn-out little monkey children. Whew! Onto round 2...
I'm so honored to have been invited to be an indefinite member of the awesome design team at Practical Scrappers- how exciting! I love that group of girls over there - the work they've been producing lately is really amazing.
This layout is for their "Anything Winter" challenge for the week. It features my favorite snow pictures of both of my babies - Andrew when he was 2 and Sophia when she was 3. I added some Ranger Stickles and bling to dress up the page, but other than that, everything else used was Close To My Heart.
Thanks for starting the New Year off with me! I hope yours is great!

Monday, November 2, 2009

Tales from the Ribbon Obsessed... part 1 (Practical Scrappers challenge)

Hi. My name is Jessica, and I *sigh* am addicted to ribbons.
Sad, I know. But really, it's true.
I have cases and drawers and baskets and jars full of ribbons.
When I saw what my challenge would be this week for Practical Scrappers - to use three or more ribbons on a project - I was thrilled. Until I couldn't decide how best to use three different ribbons. Seriously, I don't know where my brain went!
Finally, after digging through my massive collection, I came up with this:

A sweet layout of my sweet niece using four sweet ribbons. Plus it uses my favorite color combination - brown and pink - so I'm one happy girl!
The gingham and crochet ribbon is from Making Memories, the pink satin ribbon is from Target's wedding aisle and the brown polka dot satin is Offray. This also uses random scrap papers, brads, ink and card stock from Close To My Heart, a hat pin and some American Crafts Thickers.
To get the perfect knot in the center of the flower, I stuck a brad through the center of the flat piece of ribbon, the flower and the card stock and set the brad. Then, I simply tied a knot over the brad and everything is staying nicely in place.
Be sure to head over to Practical Scrappers and check out their awesome new lineup of designers and some of the oldies and goodies (like me!) too! The work over there is AMAZING!

Sunday, October 11, 2009

2 Cute 2 Spook - ACB Freaky Friday Challenge

What a weekend! After enjoying a night out with my friend on Friday for dinner and Zombieland - which, surprisingly I really liked, my son fell ill with a really high fever and nasty, hacking cough. He was a little better yesterday afternoon, so we had family date day with Chinese food for lunch and costume shopping. After 6 months of Sophia telling me she wants to be a witch for Halloween, we got to Target and she changed her mind. Now she's going as Daphne from Scooby Doo, and Andrew's going as a wizard.
Later that night, Andrew's fever and cough were back in full force. Now Sophia's complaining of a sore throat and she's a little warm to boot. Bummer... it looks like it's going to be a long week! I did get lots of house work and laundry done, plus this stinkin' cute layout.
This was done for the Freaky Friday Challenge at AC Bailey Designs forum. Did you know that if you win one of the Freaky Friday Challenges that you get a $10 gift certificate to the store? Pretty awesome, in my opinion. We've got lots of great deals over there right now too! Check it out.
The challenge this week was to create a layout using punches to create a background design. On this, I used my old CM circle punch to create a faux-scalloped circle background and the Fiskars apron lace punch for the purple Bazzill cardstock. Almost everything here was from my October Goodies of the Month kit, including the Bazzill cardstock, Pink Paislee patterned paper for the small circles and Making Memories Halloween pins. I also used a little My Mind's Eye Nightlight paper for the big circle, Bo Bunny ribbon and Sizzix swirly stamps, plus some Close To My heart letter stamps & inks. Minus the CTMH products, everything else I used can be found at the ACB store.

Thursday, October 8, 2009

Fun with Fabric - AKA Recycled Scrap

Our challenge this week at Frosted Designs was awesome... definitely one of my favorite challenges I've done so far. Our mission was to incorporate at least one piece of fabric into our layout or project. Though I don't so - in fact, not only can I not cut a straight line, but I can't sew one either. I don't have a whole lot of extra fabric on hand, but what I do have is even better.

I happen to be a bit of a pack rat. Additionally, when I see clothes sporting a cute design on them for my kiddos, I wonder if the stains that will inevitably get on the clothes will cover the cute design. I also collect fun tags from my clothes - neat twill and embroidered deals that will one day end up in some project.

Case in point: This is one of Sophia's tees that I bought for her a few years ago. She's long since grown out of it plus its got some nice pen marks from my little artist, but the flowers were so cute I couldn't bear to get rid of it.

After trimming the flowers out with my super-sharp precision scissors, I picked off the weird felty-backing and ran them through my Xyron sticker maker so they were ready to go on my project. Here's the finished look:


Aren't these pictures so funny? This is Andrew and his still BFF from waaaayyy back when they were two. Sweet little monkeys who I'm sure are going to be so mortified that I even have a picture of them kissing... let alone that I've posted it to my blog. This was taken moments before Maddi tried pushing Andrew off the little bridge, so maybe there's the validation. Good times...

Anyhow, back to the layout. Here's a close up:

This layout uses primarily all Close to My Heart items, including papers, inks, metal frame, and letter stamps. There's a piece of Bazzill Just the Edge scallop strip and a swirly stamp from Stampin' Up.
Check out the awesome prize you can win by participating in this week's Frosted Designs challenge by clicking here. I can't wait to see what you come up with!

Monday, October 5, 2009

Getting Edgy With It! Freaky Friday Challenge @ ACB


The Freaky Friday challenge over at the AC Bailey forum this week was to use two different edges in a layout or card - neither could be a scallop. Aggh! That killed me, because scallops are my favorite shape to play with. But - I just recently got an order from AC Bailey that had two packages of Bazzill Just the Edges Die Cut Strips - something I didn't think I'd use all that often, but now I use all the time.
I got the strips in brown and white - so I used the brown one as it was and just ink-distressed it slightly to match the paper - Elliott by Scrap within Reach. The green ric-rack started out as white, but I direct-to-paper inked it to the green to coordinate with the rest of the layout. I love how it turned out and wish I had made some big dinosaur or something - it would have been perfect for a stegosaurus. This green ric-rack also got the once over with dark cocoa ink. I also trimmed out a heart from one of my edge strips and tied a ribbon around the funky thin edge to hide the distortion. =)
The layout was topped off with American Crafts Thickers.
All supplies minus the buttons can be purchased here.
How edgy can you be? Be sure to enter your layout or creation in the AC Bailey Forum and Gallery by Thursday night for your chance to win a $10 gift certificate to ACB!

Friday, September 11, 2009

ACB Kick Off Crop Projects

In between dinner and getting the kiddos into bed, I managed to get everything cut and the examples prepped for tomorrow night's ACB Kick Off Crop in Silt. Those drop by will have a choice between a scrapbook layout and a card project.

Both were created with Pink Paislee's Captivating papers, Bazzill Cardstock, October Afternoon Stamps and creamy-dreamy Powder Puffs ink in Mocha Mama. The layout features puffy Thickers (chit chat) from American Crafts and Flora Doodle flowers.
The butterfly on this card was trimmed from an edge strip from Bazzill's Just the Edge die cut strip pack. It also uses Bazzill Dotted Swiss cardstock and Close To My Heart Ribbon, plus miscellaneous button and twine.
I'm pretty jazzed with how these both turned out. I can't wait to share thes projects in person tomorrow with all of my crafty friends - plus a few new ones who are joining me too. Now I'm off to create more fun-ness.

Saturday, September 5, 2009

Pictures - kind of a big deal!

As promised, here's the finished version of my kindergarten layout from earlier in the week!

Monday, August 24, 2009

Moments to Cherish

Today was a good day - crazy as it was!

As I post this, I'm eating a piece of the yummiest, homemade coconut cream pie from Midland Bakery Co. in Basalt, CO (the best-ever bakery!), drinking a glass of ice cold milk, and relishing the the silence!

I just put the finishing touches on a layout that turned out better than I imagined - gotta love when that happens!

These pictures were taken for our "happy spring" cards since I never did get my holiday cards out last year. Not that the happy spring cards got out, either, but that's another story! LOL! I did, however, have these pics framed for all the grandparents because they turned out so sweet.
This layout uses a mish-mash of materials - I really went through my supply to find the perfect mix! The papers from 5 different companies - Yellow Bicycle for the fancy-cut page, DCWV for the glittered paper on the chipboard heart, Making Memories for the red polka-dot and Stampin' Up for the rosy-circle mat behind the photos, plus a black patterned sheet of paper from a Best Occasions scrap stack I picked up at Wal Mart. The glittered title and swirl and pearl accents come from Marcella by K and the pearly flower is recycled from a gift bag I got at a friend's wedding. The chipboard heart is also from Stampin' Up.

Today also brought our Stott-family traditional first day of school breakfast celebration:

After a whole summer of sleeping in, Andrew was not too thrilled to have to wake up early and partake in the celebration. After downing some tasty biscuits & gravy, he almost changed his mind. This came, of course, only after he accidentally dumped an entire glass of orange juice all over Sophia's first day of school outfit. I had to trek it all the way back across town to pick up a new outfit for her, which ended up good because I forgot to get their water bottles and ice packs for their lunch. In planning for next year, I'll be sure to pack a change of clothes for both kiddos, just in case.

Andrew was a little grumpy, too, I think, because he was starting a whole new school. For the last week he's worried about whether he'll make friends, if he's got the meanest teacher in school and if the kids will be nice. Poor guy! Luckily we live in a small town and he knew literally half of his classmates from karate, soccer, church and summer camp.
Sophia was higher than a kite! She's been looking forward to "big girl school" for weeks and could hardly contain herself.
Even though Andrew was a little anxious, he still made sure he took good care of his sister:

See what I mean about being excited? Don't you just love that goofy little grin?!

By the time we found his class, Andrew was thinking it would all be OK. This is him at the start of the day. By the end of the day, he was grinning from ear to ear and telling me how cool it was (huge sigh of relief!!!)